1. DOWNLOAD THE FILES
Download to your computer the file that comes with your purchase, and unzip that file first.
To download the file use the direct link in your purchase confirmation email or login to your account at here.

Once you unzip the file, you will see a folder containing 4 files:
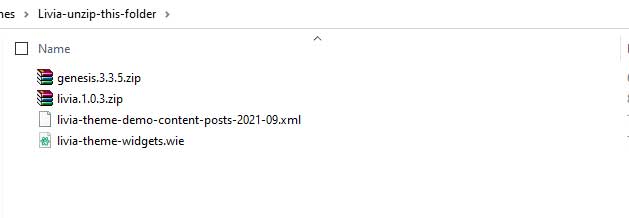
- House of Lavenders theme – .zip format
- The Genesis Framework – .zip format
- Theme demo widgets
- Theme demo blog posts
The Genesis Framework and your theme files must remain in .zip format.
Do not unzip these 2 files.
If your computer is automatically unzipping these files, you can right click and either hit zip or compress to zip them back up.
INSTALL THE GENESIS FRAMEWORK
Our themes require the Genesis Framework in order to work. You can find the Genesis framework in the file that comes with your purchase (See Getting started tab for more details on downloading the file). It also includes lifetime updates.
Do not unzip the Genesis file.
If your computer is automatically unzipping this file, you can right click and either hit zip or compress to zip it back up.
Once you have this file saved to your computer, you’ll install the Genesis Framework to WordPress before you upload your House Of Lavenders theme.
1. Navigate to APPEARANCE > THEMES
2. Click the ADD NEW Button at the top

3. Click the UPLOAD THEME button.

4. Click CHOOSE FILE, browse your computer and select the Genesis.zip file.
NOTE: It may say Genesis.3.3.5.zip or something similar.

5. When the file has been selected, click INSTALL NOW.
Wait for the installation to complete and see a success message.
Do NOT activate the theme and move on to the next step!
INSTALL THE THEME
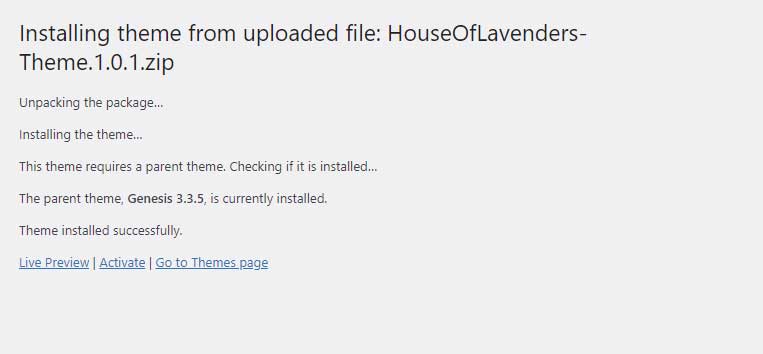
Once Genesis is installed, you’re ready to install your new House Of Lavenders theme!
If you don’t have the theme file already downloaded to your computer, see the Getting started tab for more details).
Do not unzip the theme file.
If your computer is automatically unzipping this file, you can right click and either hit zip or compress to zip it back up.
Once you have this file saved to your computer, you’ll install it to WordPress.
1. Navigate to APPEARANCE > THEMES
2. Click the ADD NEW Button at the top

3. Click the UPLOAD THEME button.

4. Click CHOOSE FILE, browse your computer and select the theme .zip file.

5. When the file has been selected, click INSTALL NOW.

6. Click on ACTIVATE and the installation process will begin.
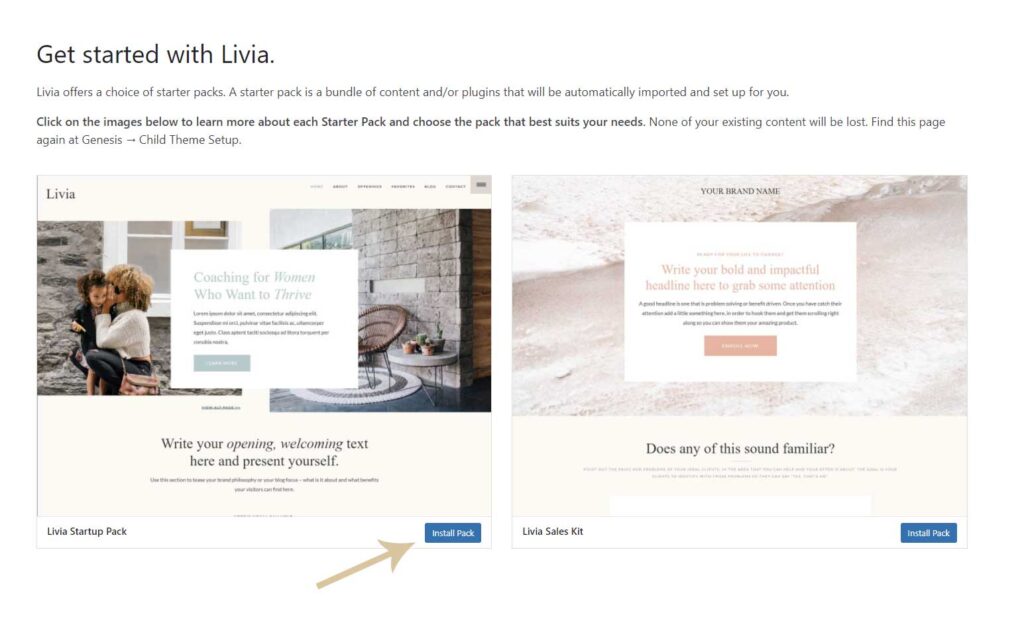
7. Click INSTALL PACK.
Note: Once the theme installs you will have the opportunity to choose your Home Page Template option.
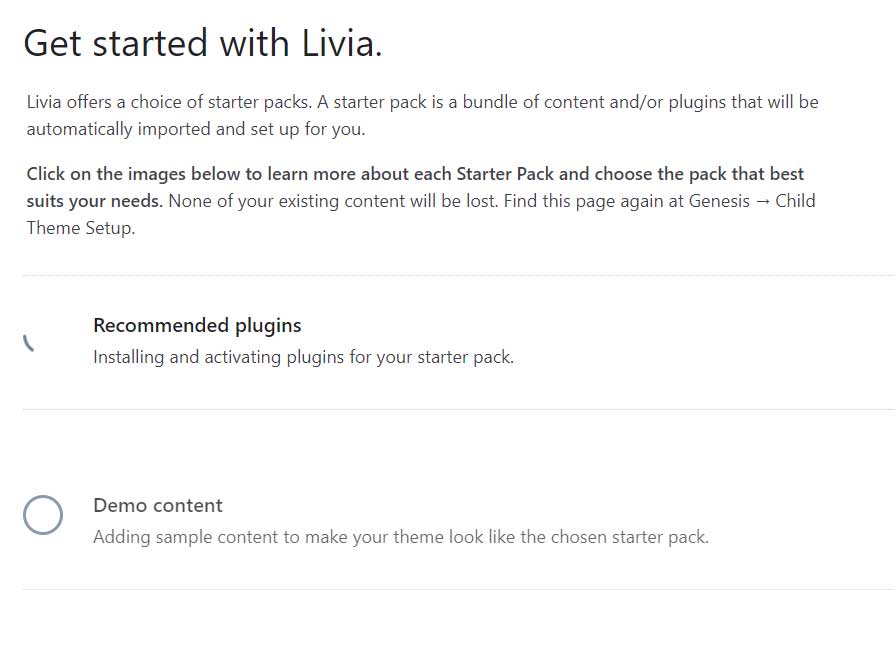
8. Once the theme is installed, you will receive this confirmation screen.
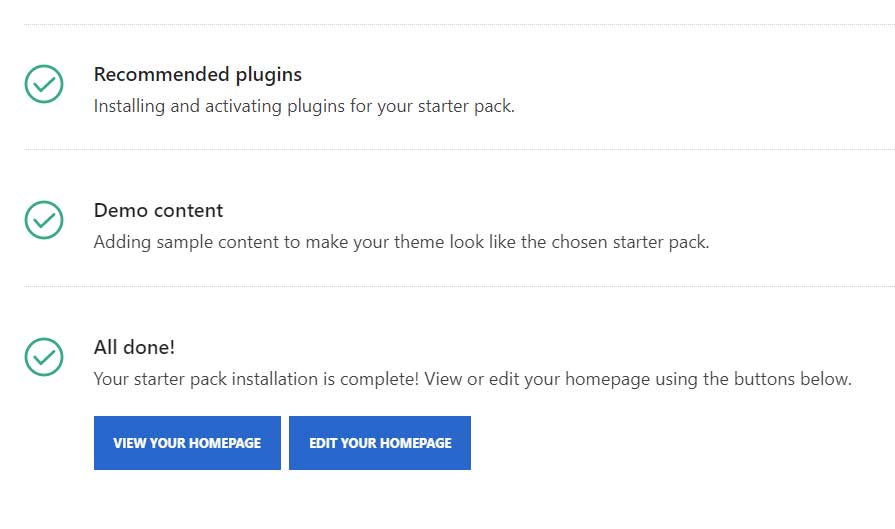
If you want to keep the default HOMEPAGE, you can choose to VIEW or EDIT YOUR HOMEPAGE.
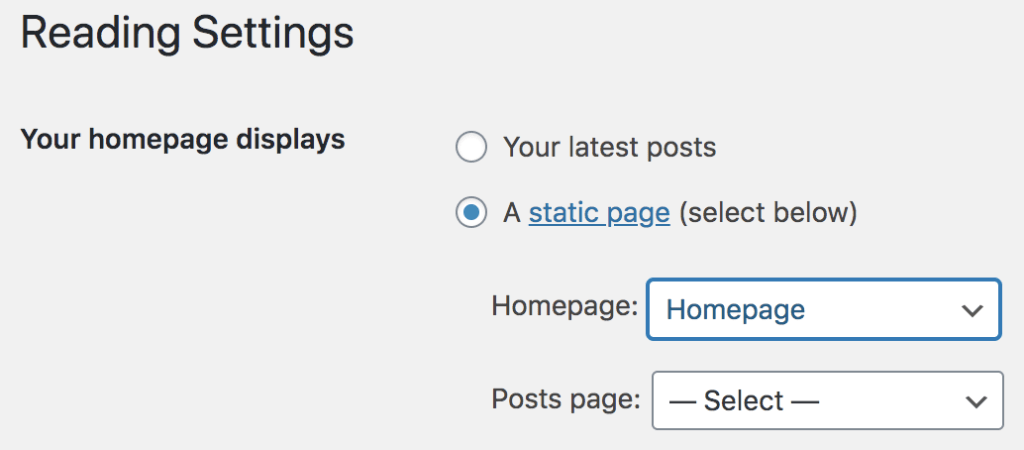
If you would like to use one of the other options, navigate to SETTINGS > READING and change the Homepage field to your choice.
THEME DEMO CONTENT
If this is a brand new website and you’d like to install the demo blog posts from the theme demo, including all images you can do so by installing the demo-content file.
See a tutorial to install the demo content at the Install demo content tab in the menu
3. INSTALL DEMO CONTENT
If you are just starting out, you might choose to install the demo blog posts, to help you see what you’re doing as you set up your site.
It includes similar content to the theme demo, such as:
- sample posts
- sample categories
- sample images
NOTE: If you already have an established site or are migrating from another platform, please DO NOT INSTALL this content, and continue on to the next step.
1. Navigate to TOOLS > IMPORT.
2. You’ll see the WordPress option at the bottom. Click the “Install Now” button.
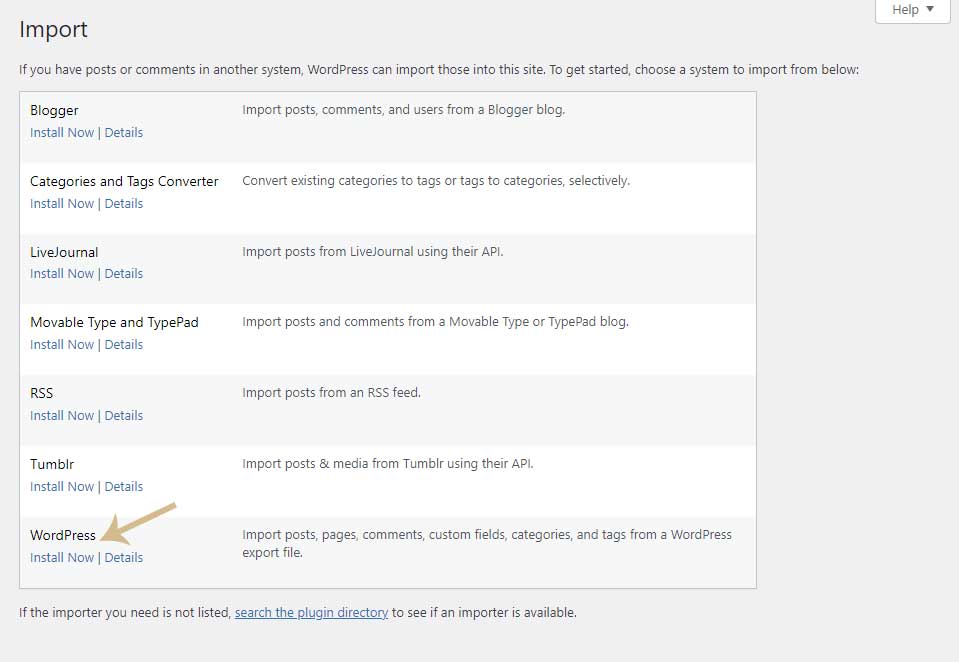
3. Once it’s done installing, you’ll click Run Importer.

4. Choose the demo-content-post.xml file in the main folder of your downloaded theme files (on your computer). Click Upload File and Import.

5. Assign all posts to your user profile (click the arrows), check the Download and Import File Attachments button, then click SUBMIT.
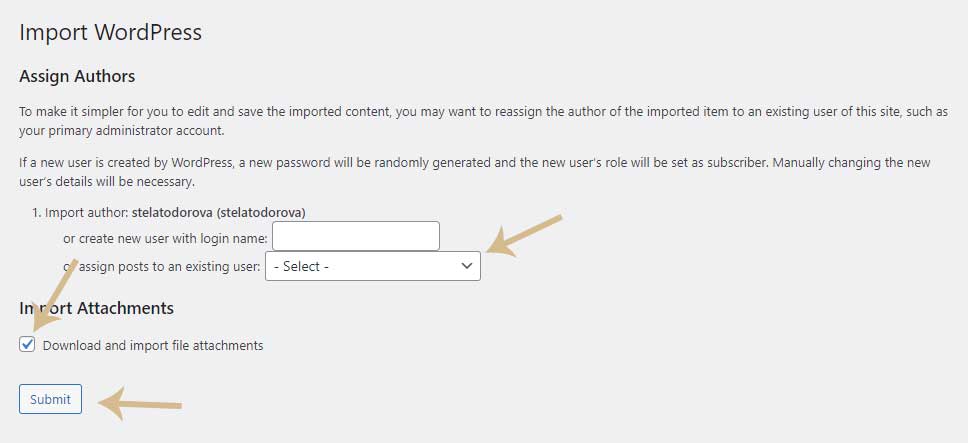
Allow it a few moments to import everything and you’ll be all set!
4. IMPORT SAMPLE WIDGETS
A widget is a small block that performs a specific function. Widgets can be added in sidebars as well as other widget-ready areas on your web page.
All of our themes have an exported widget file that can be found in the main folder of your downloaded theme files.
The Widget Importer & Exporter plugin is required before following the steps below. The plugin is automatically installed with your theme.
You can uninstall it after you import the widget file.
Before you begin, if this is a new website, it is highly recommended to remove any default widgets that are already located to widget areas.
Go to Appearance> Widgets and delete the default widgets from the Widget Areas
1. Navigate to TOOLS > WIDGET IMPORTER & EXPORTER
2. Click the ‘Choose file’ button and browse for the themename-widgets.wie file on your computer (The file is located in the XML folder that comes with your theme downloads ) Select that file and click IMPORT WIDGETS.
Note: In some cases the widgets file can not be imported directly. As an alternative open the themename-widgets.wie file on your computer with some text editor like Notepad. COPY the whole content and PASTE it to the available text area (you need to click on the ‘copy and paste’ link first, which is located just above the Import Widgets button. Then click IMPORT WIDGETS
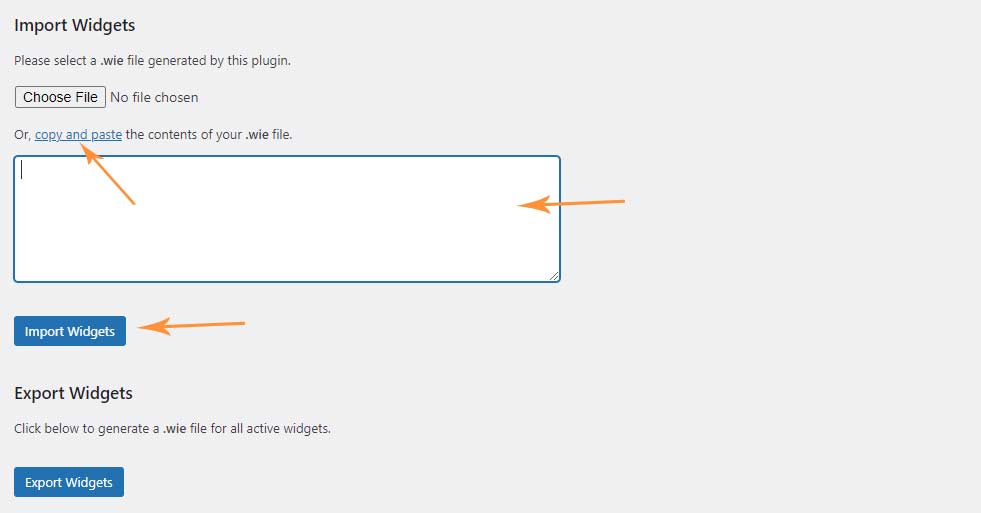
4. Once you do this, all the widgets from our demo site will be installed.
5. You can now go to PLUGINS, locate the Widget Importer/Exporter plugin, Deactivate and Delete it.
5. PLUGIN SETUP
All our themes come pre-packaged with the recommended plugins for your specific theme and are automatically installed with the theme installation.
Required plugins
- Genesis Blocks
- Ultimate Addons for Gutenberg (Spectra)
- Ninja Forms
Recommended plugins
- Add To Any
- Genesis eNews Extended
- Simple Social Icons
- Smash Balloon Instagram Feed
- Related Posts for WordPress
- WordPress Popular Posts
- Regenerate Thumbnails
- Widget Importer & Exporter
IMPORTANT
One of the required plugins – Ultimate Addons for Gutenberg released a major update on August 17, 2022 and now is called Spectra.
As there is some compatibility issue with the new version, we have contacted the plugin development team and they have given the following solution:
- Go to WordPress dashboard
- You’ll need to add this piece of code ?spectra_old_user=yes after your URL from the dashboard section and press enter to reload the page as shown in this VIDEO.
- Once you do that, the compatibility issue will be fixed.
* Until this new release is well tested, we recommend rollback the plugin to the previous version – 1.25.6 (see details further down)
We’ll test the plugin and provide additional updates to the theme if needed.
If you have any questions or issues, we are here to help 🙂
Let us know in the chat box (in the bottom, right corner of the screen) or write us an email at [email protected]
How to roll back the previous version:
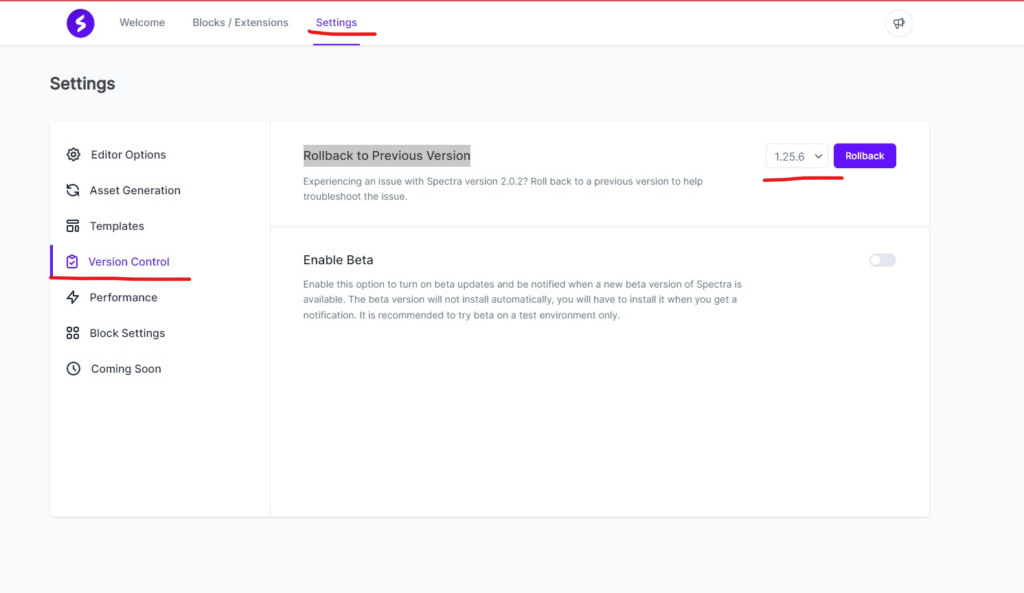
- Go to the plugins section and click the Setting link under Spectra plugin

2. Next go to Settings tab on the top, then Versions Control on the left menu, select the version – 1.25.6 and click Rollback
Some plugins need a few adjustments to look as in the theme demo:
Add To Any
A plugin for social sharing
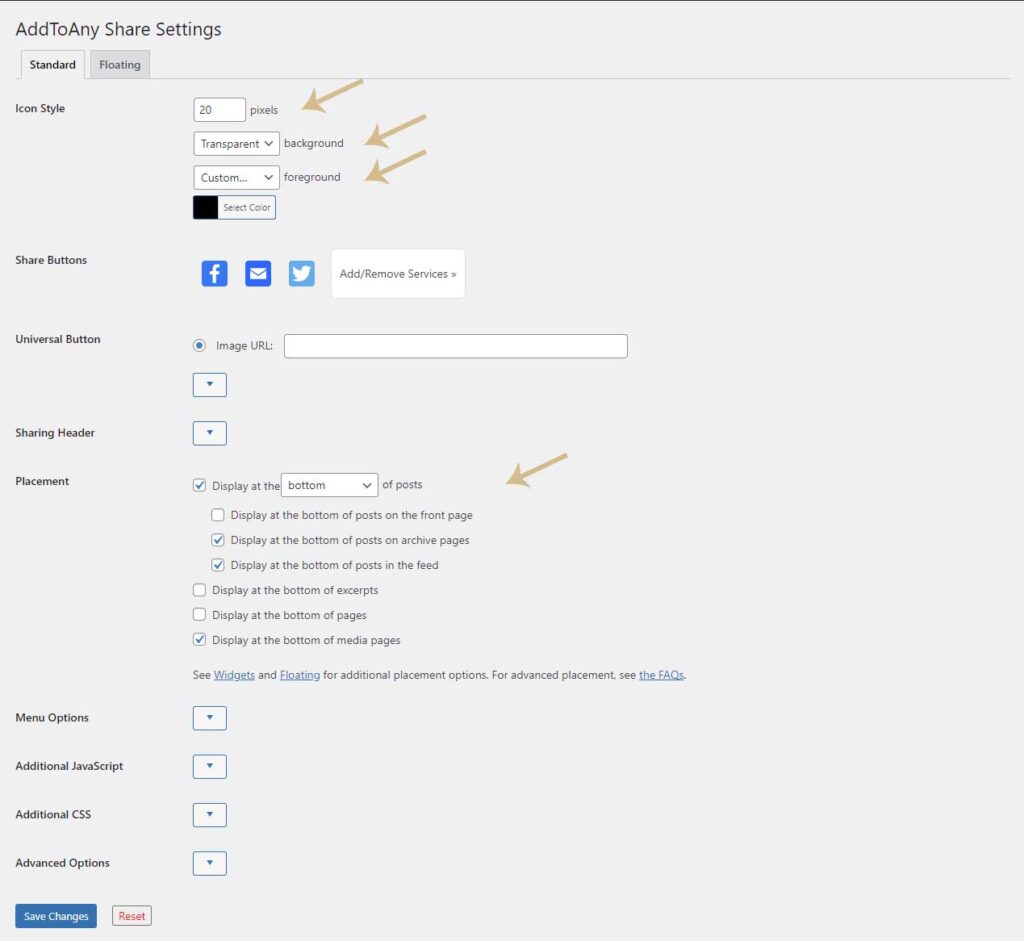
Navigate to SETTINGS> ADD TO ANY and make the following changes:
Icon Style
- Type 20 in the field
- Select Transparent from the Background dropdown
- Select Custom from the Foreground dropdown and the select the color black from the color picker.
Placement
Check the boxes as shown in the image below
Popular Posts
Some views of blog posts are necessary so that this plugin shows results. If you still don’t see the popular posts showing up on your website, even after you had some views of the posts, you can try to Uninstall and Re-install the plugin.
It is recommended to disable the default plugin’s stylesheet at plugin settings> Tools tab, for better website performance.
Related Posts
Related Posts show in the bottom of each blog post, when similar posts are available.
Navigate to SETTINGS> Related Posts
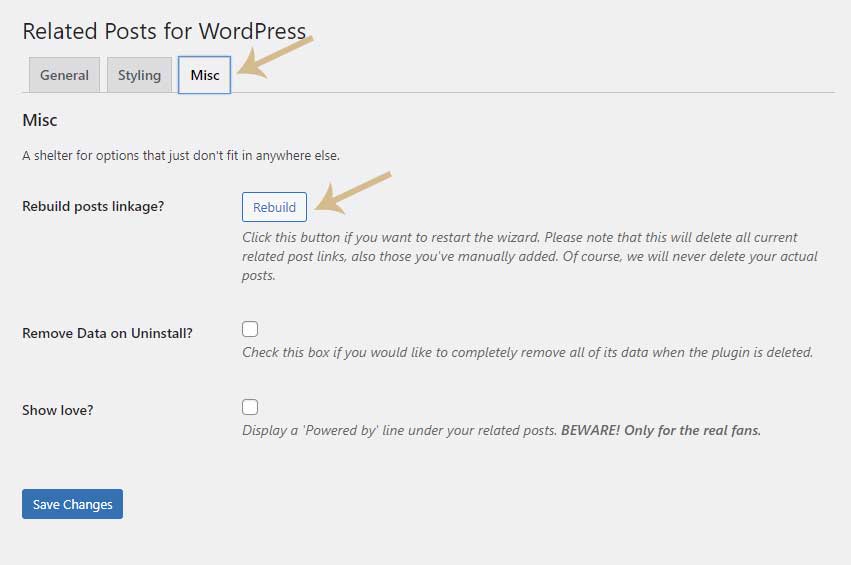
1.Go to the Styling Tab, check the Display Image button and delete the default styling in the CSS textbox.
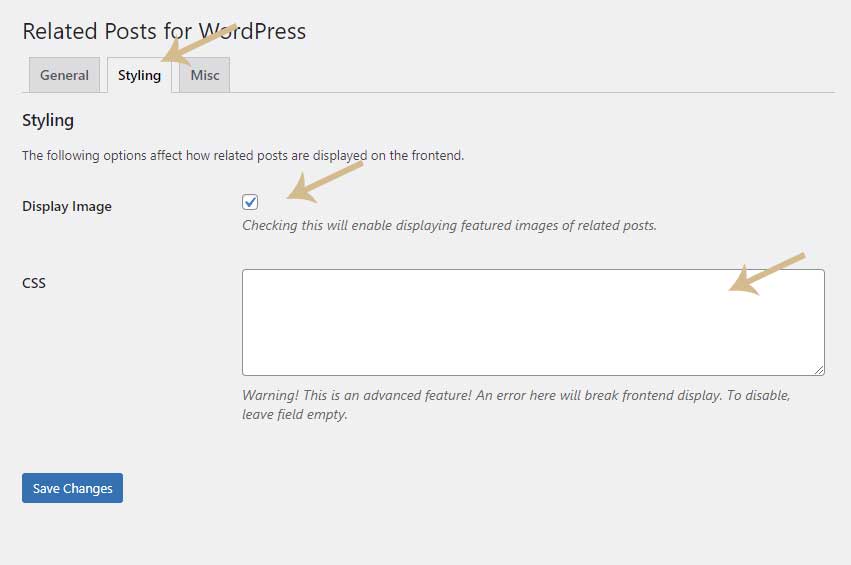
2. Go to the Misc tab and click the Rebuild button
You need to have some blog posts created so that related posts can show up
Ninja Forms
Generates the contact form in the Contact page
Go to Ninja Forms in the WP navigation menu, click on the contact form name and then click the Publish button

Smash Balloon Instagram Feed
Go to Instagram Feed in the WP navigation menu and connect your Instagram Account
Congratulations! You’ve just completed the basic setup of your new website! If you look at your site now, it will look very different than a few steps ago. It should start looking a little more like the demo. There are still a few more tweaks and customizations to make, but you’re almost done!
6. INSTALL THE SALES KIT
- In your WordPress dashboard go to GENESIS > CHILD THEME SETUP.
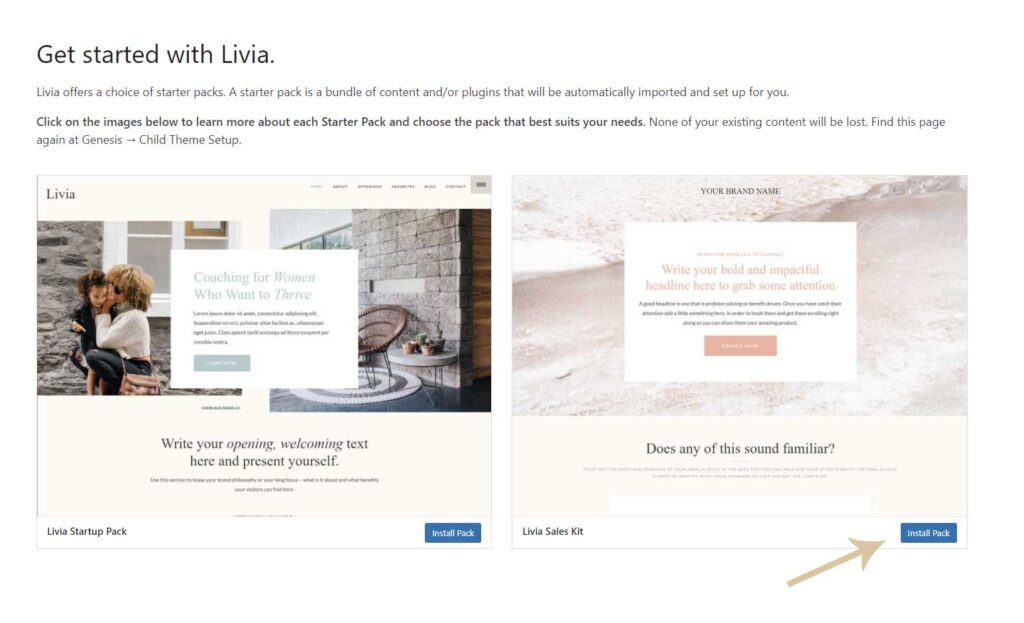
2. Click INSTALL PACK.
The Sales Kit Templates will be installed and available under Pages

